Thứ Ba, 14 tháng 5, 2013

Using Multiple Templates (Joomla 3.0)


Many times clients are interested in using two different Templates for different pages on their site. Users can create a variety looks and styles for different pages by installing and assigning templates to different pages. This article explains how to assign a template to a page that is not the current default template. The video below and the written steps that follow contain similar instructions.


Installing a Template & Changing Default Templates

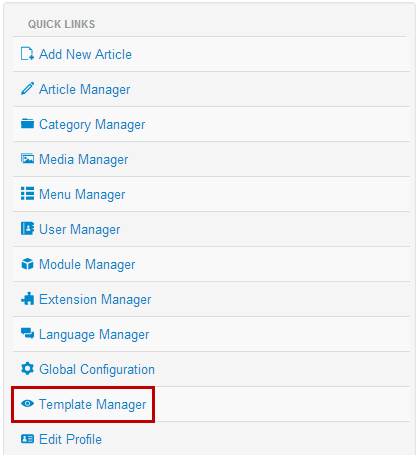
The first step is to install each Template that you'd like to feature on your site. Learn how to install a template. Once each template is installed, go to the Template Manager to select a default template.
multitemp1
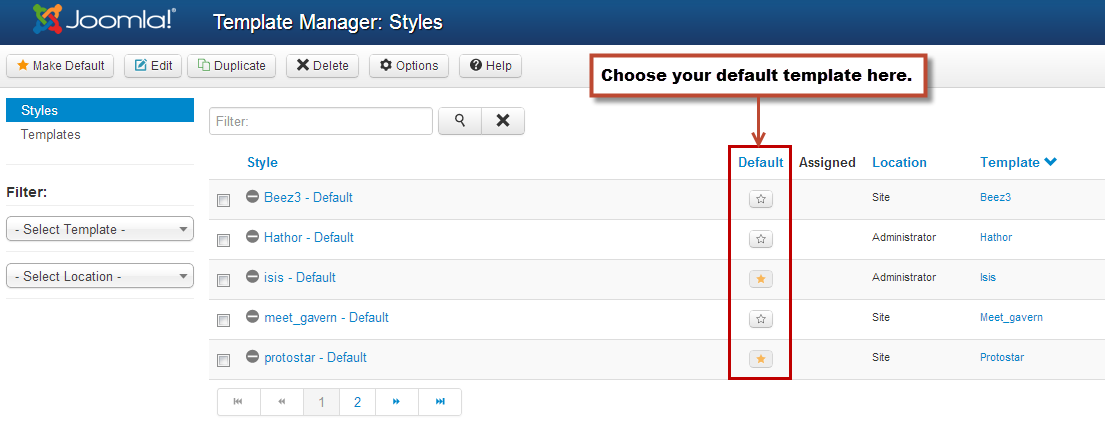
Be sure that each of the templates you'd like to use appears in the list of templates in the Template Manager. Using the golden star icon in the "Default" column, select a default template. This is the template that will be featured on all of your pages unless you select a different template for individual Menu Item (as explained below).
multitemp2

Assigning Templates through the Menu Item

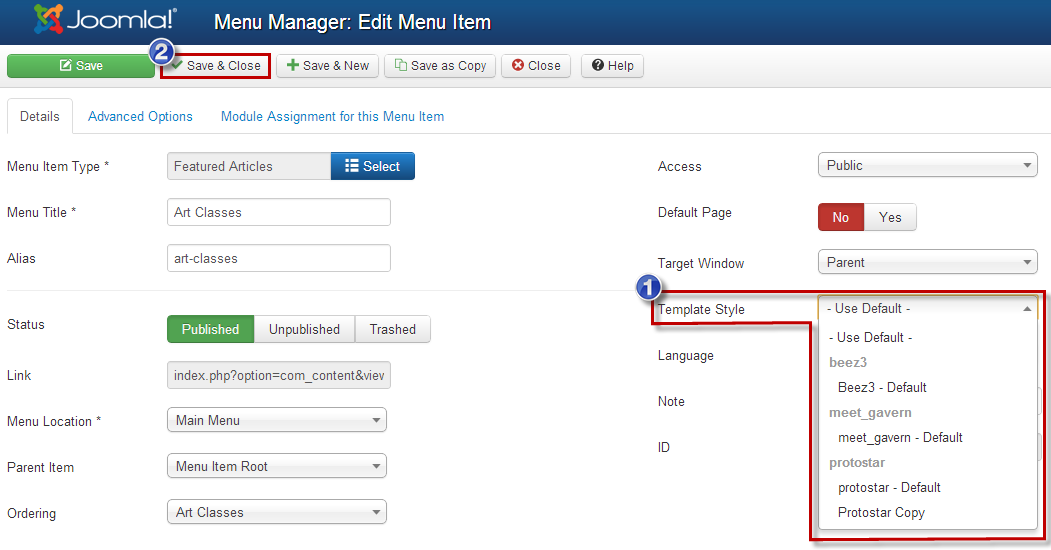
Next, go to the Menu Manager and open up the menu item (the page that you'd like to feature a template other than the default template). Once the menu item is open, look for the "Template Style" option under the "Details" tab. Using the dropdown menu, select the Template that you'd like to use exclusively for that menu item. Every other menu item will still use the default template. Be sure to save your work.
multitemp3
After saving your work, return to the front end of your site. Navigate to the page where you used a template other than the default template and you'll notice a difference.

Assigning Templates through the Template Manager

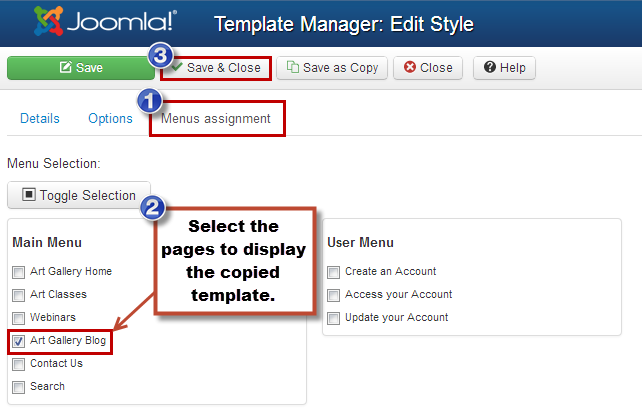
You can also assign that template to one or more pages through the Template Manager. To do this, open the template style, click on the "Menu Assignments" tab, and then select the Menu Items (the pages) where you'd like to feature the copied template. Any pages that you leave unselected will feature the default template that you've already chosen. Be sure to save your work.
templatedup6
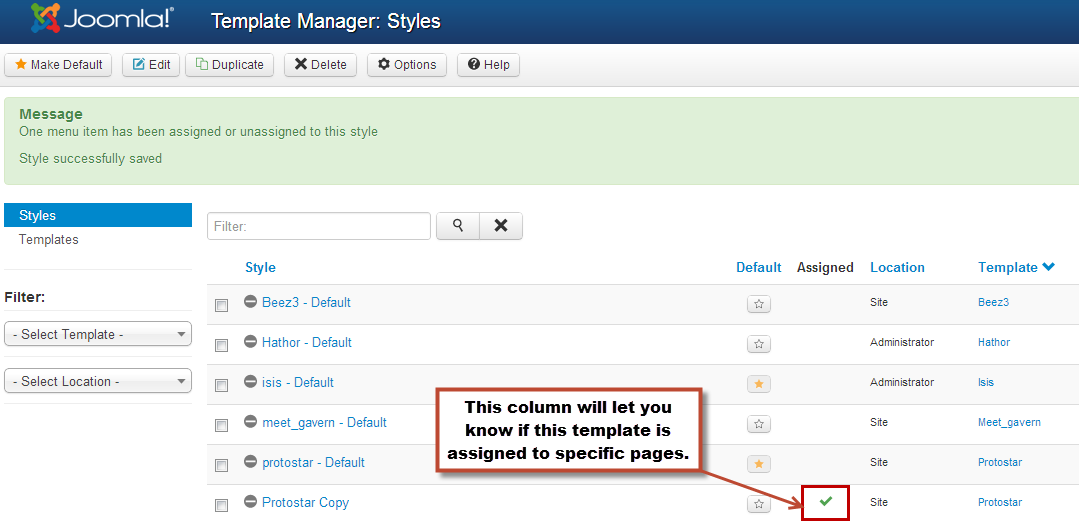
If you return to your Template Manager, you will notice that copy of the template has been assigned to a specific page.
templatedup7
Now you can return to the front end of your site. Visit your different menu items, and you'll see the template appear differently on different pages.

How do you assign a template to a specific page?


In Joomla! there is a default template, but you can assign other templates to specific "pages" that are defined by menu links.
Joomla 1.6 introduced the concept of Template Styles. Styles allow you to set up different instances of the same template, each with different parameters. It is these styles that you can assign to different pages in Joomla.
To assign a template style to a page, you must first make sure that there is a direct menu link to the page.
  • Go to Extensions>>Template Manager
  • Select the style and click the edit icon (or click the template name)
  • In the left column, change "None" to "Select from List."
  • Select the links you want to apply the style to.
  • Save
Note that you cannot assign the default style to individual pages.
Understanding
The templating system uses the ItemID to determine which template/style to show. ItemIDs are created when you create a menu link. This is why only menu items are shown in the list of pages to which you can assign templates/styles.
Assigning templates/styles according to other criteria
3rd party extensions allow you assign templates according to other critera. See the Templating section of the Joomla Extensions Directory.

Adding an image to an article


Images are added to articles using the Editor Buttons below the content editor window in the Edit Article screen. Note: It is possible to insert images using the editor in Joomla!. However, this feature provides a simple way of inserting images stored in the images/stories directory of Joomla!
  1. Open the Article for editing either by:
    • Click the Content > Article Manager menu item to go to the Article Manager, select the Article and click the Edit toolbar button.
    • Clicking the Add New Article button in the Control Panel.
    • If logged in to the Front-end, you have appropriate permissions and are viewing the Article you wish to edit: Click the Edit toolbar button.
  2. Choose where you would like your image placed in the flow of the text by moving the cursor and click the Image editor button at the bottom of the screen.
  3. The Insert Image screen will open over the top of the Edit Article screen. Choose an image by clicking on it.
    • You may also move directory by clicking on the folder icons.
    • Use the drop down Directory field to quickly select a directory and click the Up button to go up a directory level.
  4. Set the image properties as required:
    • Image Description: This becomes the alt attribute for the image, an important feature for accessibility and compliance with web standards.
    • Image Title: Used for the optional caption and also becomes the title attribute in HTML.
    • Align: Sets the image alignment. If left blank the align attribute is not set.
    • Caption: Enables the caption which displays the Image Title below the image.
  5. Click the Insert button to insert the image. The Insert Image screen will close and the image will be displayed in the editor.
    • Click the Cancel button to leave the Insert Image screen.

Uploading images using the Insert Image screen

You may also upload new images using the Upload section of the Insert Image screen.
  1. Click the Browse button to open a file browser.
  2. Select the image files you wish to upload. Click Open in the file browser to confirm the selection. Note: The file browser style and layout depends on the browser and operating system you are using.
    • To remove selected files before uploading click the red icon next to the listed files.
    • If you are uploading multiple files in batches you can clear the list of completed files by clicking the Clear Completed button.
  3. The selected file(s) appear as a list at the bottom of the Insert Image screen. Click Start Upload to begin uploading files.
    • When the upload is complete a green tick will appear next to the file.
  4. You may now select and insert the uploaded image as before.

Thứ Hai, 13 tháng 5, 2013

JCE: Embedding HTML Code into an Article (Joomla 2.5)


JCE: Embedding HTML Code into an Article (Joomla 2.5)

There are many instances in which a user may want to incorporate HTML code into an article. This process is very similar to embedding code into a Custom HTML module (read these instructions). Typically, this can done using just about any editor. This article offers step-by-step instructions for inserting HTML code using the JCE Editor, or the TinyMCE Editor which is the default editor that comes with your Joomla! application.
After logging into the Administration area, go to the Global Configuration settings for your site to determine which editor you re currently using as the default editor.
html1
If you ve already installed the JCE Editor, select it. CloudAccess.net recommends that you use the JCE Editor because it has a lot of features that many users prefer. Read these instructions to learn how to download and install the JCE Editor if you don t already have it.
html2
The rest of this article contains two sets of instructions. The first is how to embed HTML code using the JCE Editor, and the second is how to embed the code using the TinyMCE Editor.

How to embed code using the JCE Editor

First, you ll have to create a new article. Read these instructions to learn how to create a new article. If you ve already created an article that you d like to work with, open it up.
Once inside the article, locate the "Article Text" area. Above the JCE Editor, you ll see the words "show/hide". This is actually a link that will allow you to see the HTML source code. Inside the JCE Editor itself, there is also an icon to view the color HTML version of the editor. Please see the screenshot below to for both features.
html3
Below is a screenshot of out the color version of the HTML source code using the JCE Editor function.
html4
This is the area where you ll cut and paste or alter the HTML source code for your article. Once you re finished, you can close the source code view by selecting the same icon. Be sure to save your work, and you ll be all set.

How to embed code using the TinyMCE Editor

If you re using the TinyMCE Editor, the process is very similar. First, you ll have to create a new article. Read these instructions to learn how to create a new article. If you ve already created an article that you d like to work with, open it up.
Once inside the article, locate the "Article Text" area. In the TinyMCE Editor, locate the "HTML" icon. When you select the "HTML" icon, a new window will open for you to edit the HTML code. Please see the screenshot below.
html5

When you select the "HTML" icon, a new window will open for you to edit the HTML code. This is the area where you ll cut and paste or alter the HTML source code for your article. Be sure to update your work by selecting the "Update" button.
html6
After you re done updating the code, save the article, and you ll be all set.

How to Link Articles in Joomla 2.5 (valid for Joomla 1.7 and 1.6 too)

How to Link Articles in Joomla 2.5(valid for Joomla 1.7 and 1.6 too)

In this part of our Joomla tutorial we will learn how to link articles to the web site menus. The tutorial is written for Joomla 2.5 but the same steps should be taken if you are using Joomla 1.7 or even 1.6.
To make your articles and the corresponding pages accessible, you should set links to them. This can be completed by including these links in the web site menus.
Open your Joomla admin area->Menus->Main Menu.

Menu Items

Click on the New button.
Choose the Menu Item Type from the corresponding dialog. If you want to link a standard article pick the Single Articleoption.

Single Article

Then enter the link title in the Menu Title field and select the corresponding article which will be linked through the Select Article functionality.

Menu Title

Save the changes and view the new menu item located on your frontend.

How to publish your article on the home page?

In order to make one of your articles the home page for the web site, navigate to the Joomla admin area->Menus->Main Menus.
Select the article and click on the Home icon.

Home

The change of the default home page article will be confirmed with the following message:
One menu item successfully set to home
If you want to remove the old home page article, select it and click on the Trash button.

Working with Article Categories in Joomla 2.5


What is a Joomla Category?
When you write an article in Joomla 2.5, you assign it to a category. You can think of a category just like a folder. Assigning articles to categories helps not only to categorize and keep track of articles, but it also helps your website visitors find similar content based upon the category of the article they're reading. This is a standard thing to do when writing an article.
Can I have Categories of Categories (Sub Categories)?
Previous versions of Joomla (ending with Joomla 1.5) used a section / category structure. What this meant was that every article belonged to a category, and every category belonged to a section. This was somewhat limiting as it would not allow for deeper categorization of content. For example, you could not have subcategories of categories. It also required that you have both a section and a category, when sometimes only a category would be needed. Newer versions of Joomla don't use the section / category structure any longer. Instead, only categories are used now, and you have the ability to created sub categories of categories if needed.
To create a new category in Joomla 2.5:
  1. Log into your Joomla Dashboard
  2. Under the Content menu, hover over Category Manager and then click Add New Category
    click-add-new-category
  3. Type in a Title for this category
    enter-the-details-of-your-new-category
    (this screenshot applys to the steps below as well)
  4. Choose a Parent Category.
    Is this a Parent Category?
    If you would like this category to be a main category (one that is not a sub category of any other category), choose - No Parent -
    Is this a Sub Category?
    If you would like this category to be a sub category of another category, then choose the parent category.
  5. Type in a Description for the category (this is an optional step). This description will show when someone visits the category page (a page that will list all of the articles belonging to the category).
  6. Click Save & Close. You have just created a new category in Joomla 2.5!
Adding a category to Joomla does not automatically add the category to any menus on your site. If you wanted to link to this category from a Joomla 2.5 menu, you will need to add a new category menu item to the menu of your choice.
In our next article, we will show you how to add images to your Joomla 2.5 articles.